Tuesday, August 21, 2012

DIY Light Box

I vaguely remember three things about my preschool experience--
1. At snack time my teacher would make "Tinkerbell" dance around the ceiling (now I know it was a flashlight, but where was she hiding it?)
2. The sand table-- oh, I loved the sand table. (Probably because my parents built my brothers and I a sandbox out in the backyard.)
and 3. The light table.

There is something about water, sand, and light that children adore. And who can really blame them? I have just as much fun experimenting along side them with those three same things!

When I started coming across ideas for DIY light tables on Pinterest, I was excited. Most preschool/day care programs these days just don't have the funds to get a $200-$500 piece of equipment they may see as "frivolous". As I searched through the blog posts hoping to see the right idea jump out at me, I became disappointed. I am not a carpenter, and neither is my husband-to-be (however, this is something I'm really interested in exploring). And the plastic box ones... something was just... missing.

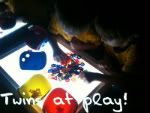
Until I saw this post: "The Perfect DIY Container Light Box" at Caution! Twins at Play. Jackpot! I had found the simple solution- a storage box from IKEA, and a light from Walmart was all I needed!

Now, I'm not one of the fortunate ones who has an IKEA within reasonable driving distance. This is probably better for my pocket book because I've been once, and I love that place. (In fact, I'm going again this weekend.) I researched where the "local" IKEAs were and low and behold, there was one not far from a racetrack the husband-to-be was dragging me to. So that problem was solved.

Total cost- the SNÃ…LIS box & lid at IKEA was about $8, and this LED Remote Control Light light at Walmart was $15 (plus batteries). So for $23 this is a very practical DIY Light Box and really it couldn't be any simpler to make. Putting it together is really quite simple: add batteries to light and remote, secure light to bottom of box, put on lid, whala! You're done.

Today I introduced my class to the Light Box and boy, it was a hit!

I found some simple manipulatives at the Dollar Tree for the introductory period: glow in the dark stars, ocean animals, and other animals. As well as a pack of six simple tops (my kids LOVE tops-- spinners they call them-- so I knew these would be a hit). I also picked up some clear plastic plates to maybe draw on with dry erase markers later.

I have a thicker fleece blanket hanging over the light box-- being supported by our stacked cots and Discovery shelf. This helped, but ultimately it was best when the lights in that part of the room were off.

I had a two-year-old visitor from my old room and she figured out if you spun the top and put the flashlight (we have four flashlights in our Discovery Area) that it made a cool color pattern:

Trying to capture it was hard with my camera. She was fascinated by it. :)

I have more plans for my little Light Box and my Threes-- gel bags with glitter, water beads, slime, wikki sticks, maybe sand. I also want to purchase some more manipulatives, like the Magna-Blocks, but right now I'm keeping it simple. I'm also looking for more ideas, so if you have any, please leave a comment! :)


Until Next Time-


Sunday, August 19, 2012

Yes, I'm another Pinterest-addicted Teacher!

I have been very busy getting things ready to go for the new school year. We have decided to switch from "Summer Camp" to "School" the day after Labor Day. While I've been getting the room ready, I've had kiddos coming & going as well. Some are leaving to start Preschool at other programs, and some have officially "aged out" of my room. This also means I've had some brand new threes start. Needless to say, it's been a busy & wonderful few weeks in our room.

I wanted to write a post about this wonderful addiction most everyone is aware of: Pinterest.


Seriously, if you work with preschoolers in any capacity: day care, home day care, school district, private school-- whatever!-- you NEED to be on Pinterest. Why? Because it is full of great ideas from teaching lessons to free printables to classroom management to classroom set up to things to do that break you from your every day boredom. It has proven to me to be a valuable resource over and over again.

I have at this moment in time almost 3,000 pins on my Pinterest boards, and most of them are Early Childhood related. Don't believe me? Check out my boards: Learning With Threes on Pinterest

Now if you aren't familiar with how this site works, here's the quick simple explanation: all of those pictures represent links to websites, or blogs with information about the picture. This information has always been out there, but Pinterest makes it way easier to locate and file. In addition, I'm a visual person so if I see a picture I'm more apt to remember I have a resource on that topic.

So you sign up for a brand-spankin' new Pinterest account and now what? Here are a few tips for newbies to Pinterest who want to get the most out of it:

- Don't use broad headings for your board. You can have as many boards as you need. Avoid using "Preschool" to name a board then pinning everything related to Preschool to it. Try narrowing your boards down by category- "Preschool- Art", "Preschool- Gross Motor", "Infant Classroom Ideas", etc. You'll thank me later when you have 3,000 pins and need to find something quick!

- ALWAYS, ALWAYS, ALWAYS click the picture to make sure it actually goes to the idea. I don't know how many times I've gone to a blog post and it's not the right one. It's frustrating I know, but there are tricks you can use to find the original source.

-You can follow all of some one's boards, or just a few of their boards. I love my friends to death, but some of their boards just don't interest me-- "Pretty People" for example, I really don't care about "hot" celebrities. You can unfollow boards if it doesn't interest you-- and don't hesitate to do it! This keeps your feed things that interest you!

- Use the search bar at the top left of your Pinterest header to search for pins, boards, and people. Type in what you're searching for, then it will take you to a new page. Directly below this search bar is this: "Pins * Boards * People". Click on them to change what you are searching for.

- Pinterest has apps for smart phones, & I use mine a lot. But sometimes I want to just save a pin until I can get home and get on the laptop before I check it out. For this Pinterest has the "like" button. I click the "like" button when I want to save something but don't necessarily want to pin it just yet-- what if it turns out to be spam? or not the right blog post?-- these pins are saved in your "Likes" and you can go back and look at them, then decide to re-pin or not.

- This is just a personal preference of mine but if you link your Facebook & Pinterest, please do not post your pins to Facebook. This eats up your friends' timelines and odds are if you are friends with them on facebook, you will follow them/they will follow you on Pinterest. This is also true of Twitter!

These are just a few tips and pointers I have as a self-proclaimed Pinterest addict. If you have any specific questions, please leave a comment and I will try to help!

Tomorrow I plan to post about the DIY Light Table that Pinterest helped me build for our room!
Until then--


Thursday, August 2, 2012

Classroom Organization: Parent Mailboxes

I'm almost positive I'm not the only Early Childhood Teacher who struggles with getting notes and things out to parents. I've tried many different methods of mailboxes, and it seems what works with one set of parents inevitably never works with the next set (sort of like classroom management with the kids!). My current set up does not have much space by the Parent Communication Board or the Sign In/Out Clipboard, so I had to think outside of the box and this is what I came up with:


Yes, this is a $5 over-the-door shoe organizer from Walmart. We have a door inside our class that leads to the next door class right next to our Parent Board, so this was perfect! I used Command hooks to hang it low enough for parents to reach. The pockets are clear so I can see easily who has mail. Parents like they can quickly check it too. So far it's worked in our room.

What are your clever ideas for Parent Communication? How have you gotten your parents in the habit of checking their mail?

Until Next Time-

Wednesday, August 1, 2012

Sensory & Art: Shaving Cream Body Painting

It's fitting that my first post to this new blog is about an extremely fun, messy, sensory & art project: my two favorites combined into one! My three & four year old class absolutely loved this activity today, and even the four & five year old class enjoyed it.


What You Will Need:
-1 or 2 cans of shaving cream (I used the sensitive skin kind that's $1.14 at Walmart)
-Washable Fingerpaint in any color you want (red paint tends to leave a stain no matter how washable it claims to be-- we stuck to blue, yellow, and green).
- Water
-Small containers to mix in and paint from
-Paint brushes, but it's also fun to just use your hands
-A hose and baby soap for clean up!

Here's how we made the paint (yes, we-- my kiddos are always involved in the whole process of the activity! However, I should have put them into their messy shirts to do this).

1. Squirt some shaving cream into the bowl.


2. Add a spoonful of finger paint.

3. Add a little bit of water to make it the consistency you want. (Add no water-- you get a "cottage cheese like" consistency, add a little water for smoother texture, a lot for a soupy mess.)

4. Stir it up until it's mixed evenly.


We made 12 small bowls of paint, this was probably enough for my 15 kiddos, but we were being joined by another 14 kiddos from another class, so in hindsight, I needed to probably double what we made. (Mental note for next time.)

While they changed into their swimsuits of course I let them play in the shaving cream! :)
They made a pretty big mess, but it was okay-- it was a clean mess. :) These two figured out they could write in the shaving cream and decided to "write their names".

Next we took our shaving cream paint and paintbrushes outside and got to it. I apologize for not taking pictures of what the paint looked like, but when you have 15 preschoolers ready to go, they are ready to go with or without you!

They needed little instructions and dove right in. To keep it simple, they could only paint their trunks (no faces) and only themselves. Even those 2 rules were easy to follow with this activity. I wish I didn't have to blur their faces because the smiles on their faces were priceless. I can say with 110% certainty they enjoyed every moment of this activity.

Some of the final "products":

When we ran out of paint, we just hosed them off and used a tiny bit of baby soap to clean them up. The paint came off their skin and suits cleanly with no stains.

So what exactly did they learn?
I believe in art as a process over a product (craft) so this was mostly an art experience using a slightly different medium (puffy, smooth paint) and their own body as the canvas.

To tie in learning we talked about the colors they chose to use, body parts, how it felt to paint with the brush, how the paint smelled differently, what happened when we mix two colors together, and what happened when we rinsed the paint off.

Overall, this was most definitely an experience in self-control for some of my boys-- painting only their trunk and not painting other kids or the playground equipment. And as anyone knows who works with preschoolers, self-control is a big deal developmentally.

If you try this out, please leave a comment and let me know how it went for you! Also, don't forget to follow this blog... it's still in it's infancy, but I promise more fun activities! :)

Until Next Time,


** You have my permission to pin this post, but please do not pin the pictures with my kiddos in them. Pin the top picture with the text. Thank you!! :)